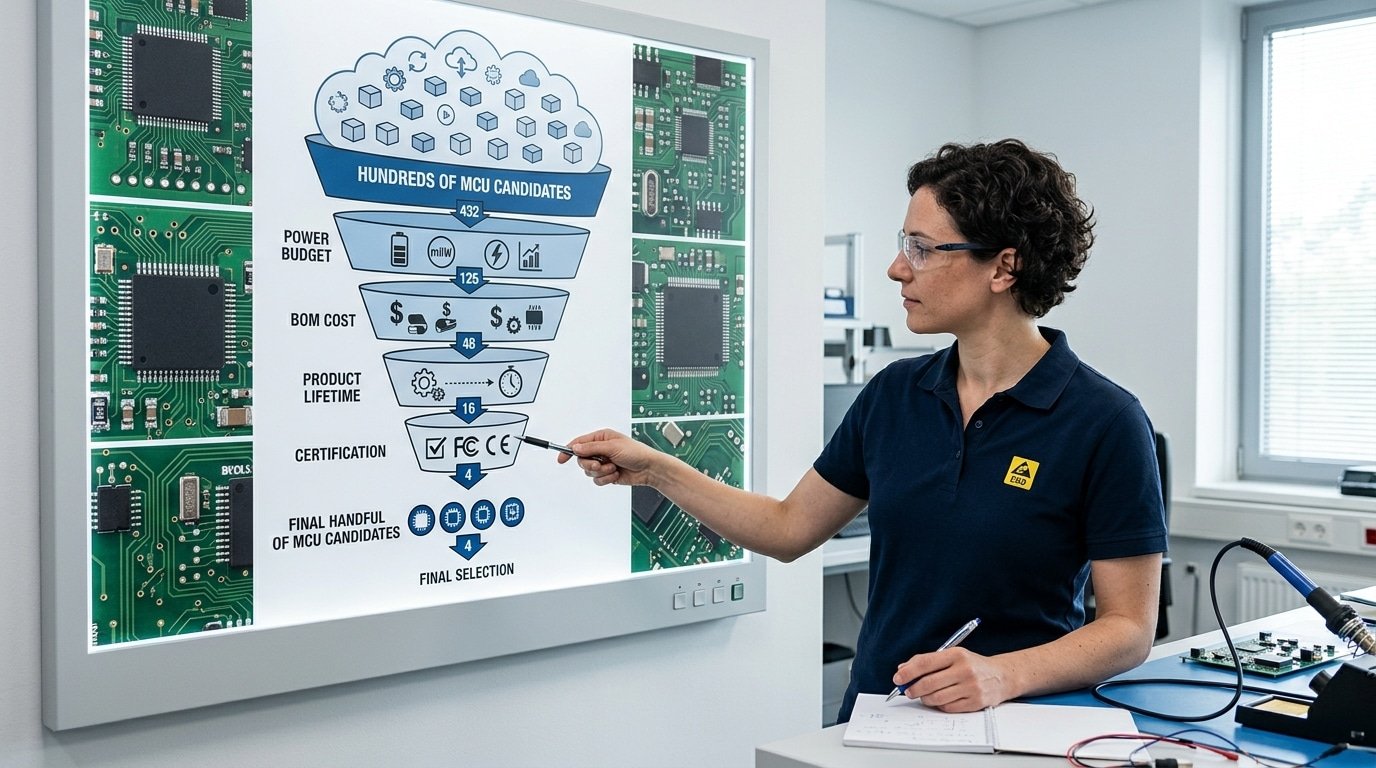
To choose the right chip for an embedded project, score your real constraints against each chip’s specs using a weighted decision matrix, assigning 1–5 weights to factors like power, cost, and peripherals, then pick the highest weighted sum. Start with four numbers: power budget, BOM cost ceiling, product lifetime, and certification needs—these kill roughly 80% of candidates upfront. In 2026, a single MCU family spans 8-bit AVR cores under $0.50 to 64-bit RISC-V parts running Linux, so let the math decide, not habit.
That single method answers most of the question of how to choose the right chip for embedded project work: stop guessing, score your real constraints against the chip’s real specs, and let the math decide.
The catch? Most engineers skip the matrix and pick whatever board they used last time.
That habit costs you in 2026, when a single MCU family spans 8-bit AVR cores at under $0.50 to 64-bit RISC-V parts running Linux. This guide breaks the choice into the factors that actually move your bill of materials, your firmware effort, and your ship date.
Quick Takeaways
- Use a weighted decision matrix scoring chips against your real project constraints.
- Define four numbers first: power budget, BOM cost ceiling, lifetime, certifications.
- These four constraints eliminate roughly 80% of candidate chips immediately.
- Stop reusing last project’s board—let weighted math pick your chip.
- Coin-cell designs need under 10µA average; most MCUs draw 50µA+ sleeping.
Start With Product Constraints, Not Feature Lists
Before you open a single datasheet, write down four numbers: your power budget, your bill-of-materials (BOM) cost ceiling, your expected product lifetime, and your certification needs. These four constraints kill roughly 80% of candidate chips outright.
Learning how to choose the right chip for an embedded project starts here, not with comparing clock speeds.
A feature list tempts you to chase the fastest core or the most peripherals, but a microcontroller (MCU, the small computer chip running your device) only matters if it fits the product reality.
A coin-cell sensor that must run two years on approximately 220mAh has a power budget under 10µA average.
Most general-purpose MCUs draw 50µA+ in sleep. That single number deletes hundreds of parts instantly.
Cost cuts just as hard. If your BOM ceiling is approximately $1.80 for a smart switch, a 32-bit Cortex-M7 at approximately $4 is off the table, no matter how capable it looks.
Lifetime and certification finish the cut. Products built for 7+ years need chips with clear lifecycle status, because cost and long-term availability (NRND or end-of-life risk) decide whether you’ll be redesigning in year three. Medical or automotive targets demand parts pre-qualified for IEC 60601 or AEC-Q100.
Define the box first. Then find the chip that fits inside it.
Define Performance, Memory, and Real-Time Targets Before Browsing Parts
Pin down three numbers before you touch a parametric search tool: required compute (in DMIPS or raw clock), flash and RAM with 30,approximately 50% spare, and your timing model (hard real-time, RTOS, or bare-metal).
Skip this and you either over-pay for silicon you never use, or hit a memory wall three months into firmware.
DMIPS measures Dhrystone Millions of Instructions Per Second, a rough yardstick for integer throughput. A Cortex-M0+ runs near 0.95 DMIPS/MHz; a Cortex-M4 hits about 1.25 DMIPS/MHz with a DSP unit. If your code does sensor fusion or FFT math, the M4’s single-cycle multiply-accumulate matters more than raw clock.
Estimating flash from complexity? Use this field rule: a bare-metal sensor logger fits in approximately 32,64KB; an RTOS-based device with a TCP/IP stack and TLS needs approximately 256KB minimum, and a small graphics UI pushes past approximately 512KB.
Headroom isn’t optional, practitioner guidance recommends overspecifying memory and CPU so later feature growth doesn’t force a redesign.
Real-time determinism is where engineers underestimate. “Hard real-time” means a missed deadline is a failure, motor control at a 20µs loop, for example.
Check the datasheet for worst-case interrupt latency, usually 12,16 clock cycles on Cortex-M; that translates to under 0.2µs at approximately 80MHz. An RTOS adds jitter, so budget for it.
Knowing how to choose the right chip for an embedded project starts with these numbers, not a feature checklist.

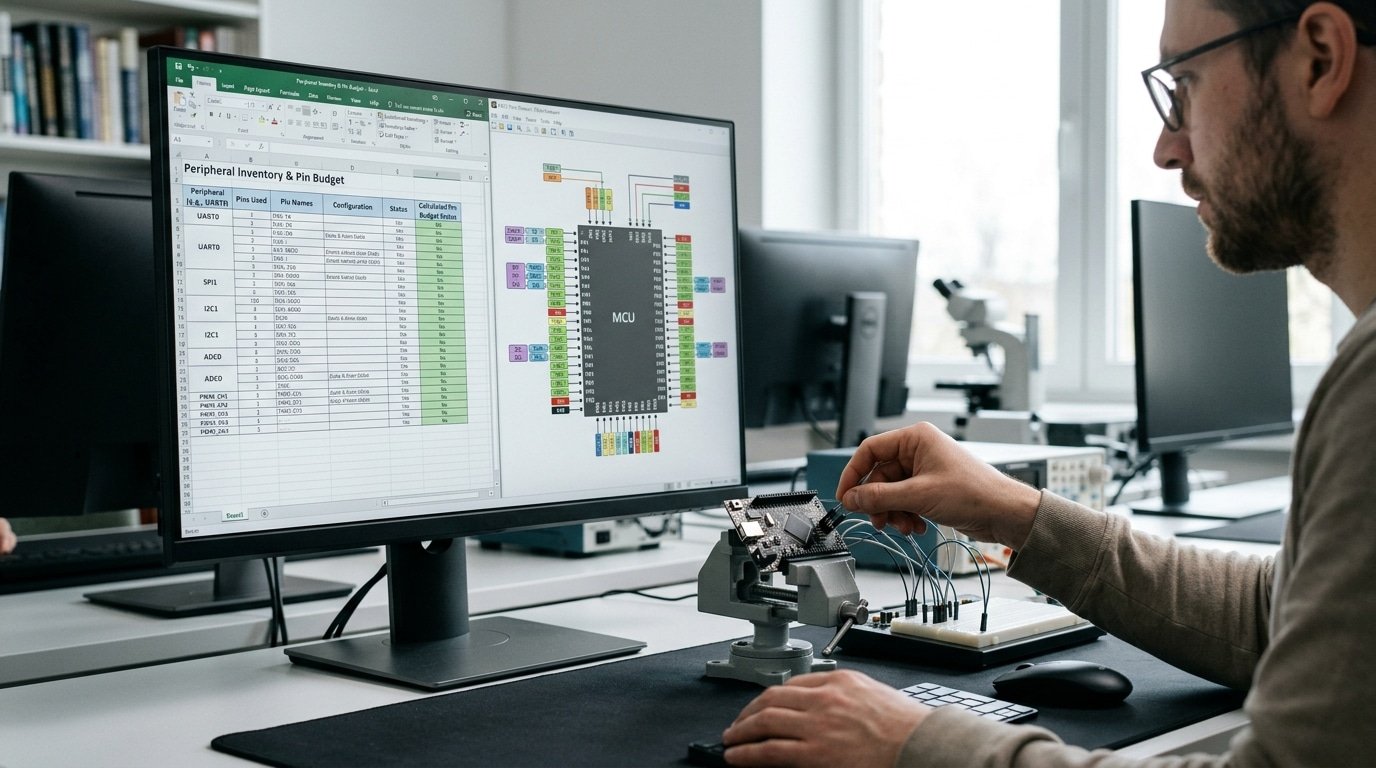
Map Every Peripheral, I O Pin, and Connectivity Interface You Need
Before you shortlist any part, build a peripheral inventory: list every UART, SPI, I2C bus, ADC channel, PWM output, USB port, CAN node, and Ethernet or BLE/Wi-Fi link your design touches. Then count GPIO with at least 20% spare pins.
This single table prevents the most common reason teams scrap a chip mid-project, running out of pins.
Peripheral requirements are one of the core technical factors in chip selection guidance, alongside connectivity interfaces like CAN and Ethernet. The inventory also exposes mismatches early: a sensor hub needs many ADC channels, while a motor controller needs timer-driven PWM with dead-time control.
Worked pin budget
- 2 UARTs (debug + GPS): 4 pins
- 1 SPI (flash + display, shared): 4 pins
- 1 I2C (3 sensors on one bus): 2 pins
- 6 ADC channels (analog inputs): 6 pins
- 4 PWM (RGB LED + buzzer): 4 pins
- Buttons + LEDs + status: 8 pins
That’s 28 pins used. Add approximately 20% margin and you need a package with roughly 34 usable GPIO, so skip a 32-pin part.
Integrated radios change the math. An MCU with on-chip BLE cuts part count by one module and avoids a separate RF certification, but locks you into that vendor’s stack.
An external module (think Nordic or u-blox) adds board cost yet ships pre-certified, saving months of FCC/CE testing. Decide which trade matters more before you commit silicon.
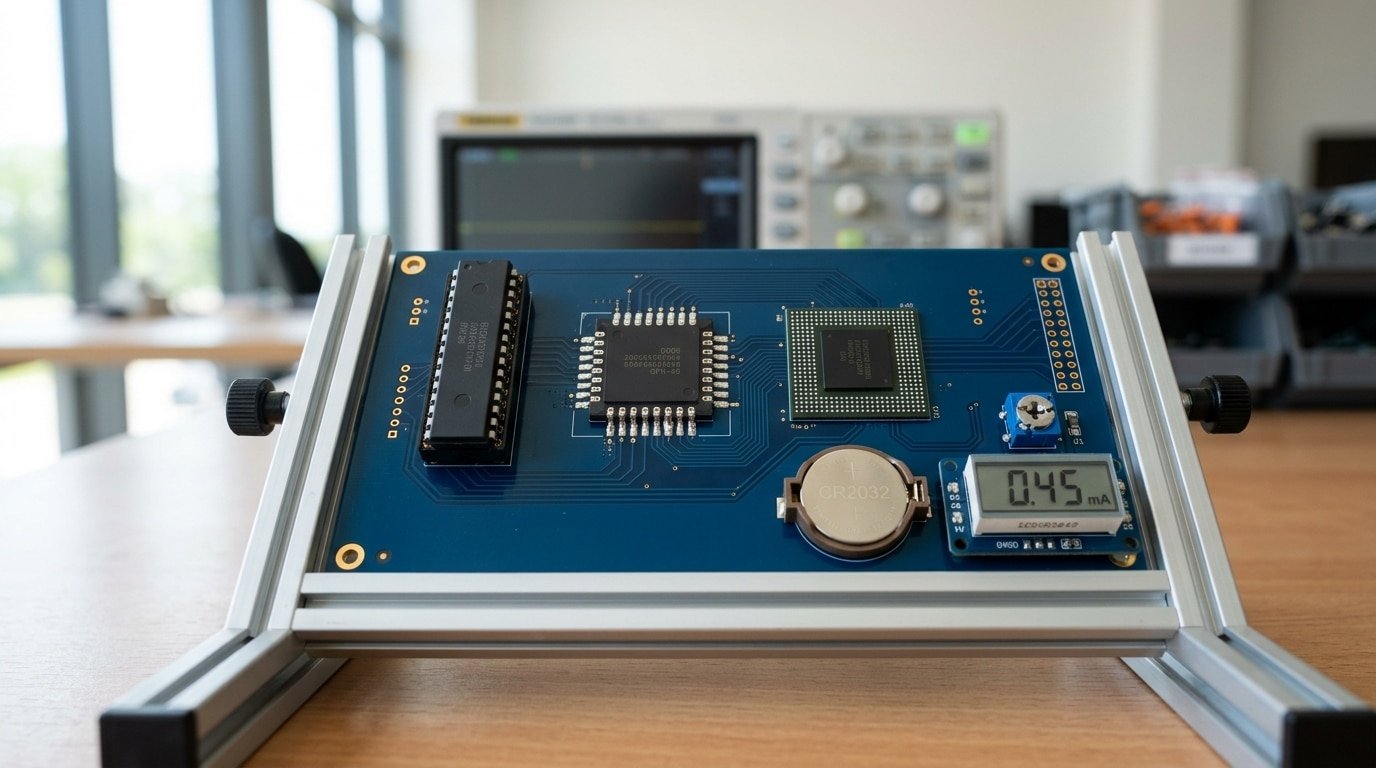
Match Power Budget, Package, and PCB Constraints to Real Numbers
Start by turning your energy budget into a current ceiling. A CR2032 coin cell holds about 225 mAh.
If you want it to last two years, which works out to approximately 17,520 hours, your average draw has to stay under roughly 13 µA. That one number alone rules out most chips before you even glance at another spec.
So compare the datasheet currents at the conditions you actually run in, not the headline figure they like to advertise. There are really three rows worth watching here.
- Active current — this is the power the chip pulls while it is running, usually quoted in µA per MHz. An 80 µA/MHz part at approximately 48 MHz draws about 3.8 mA when it is working.
- Deep sleep with RAM retention — honestly, this is the number that decides battery life. Anything under 1 µA matters. Some STM32L and MSP430 parts hit 0.3 to 0.5 µA with a timer still awake.
- Wake-up time — a 100 µs wakeup wastes far less energy than a approximately 2 ms one, especially if you wake up every second.
Low-power modes like deep sleep get flagged as a critical selection criterion for battery and IoT designs. Why? Because the sleep figure, not the active one, is what really sets how long your device runs.
The package you pick shapes both cost and whether you can build a prototype by hand. Knowing how to choose the right chip for embedded project means weighing how easy it is to solder against how much board space you have to spare.
| Package | Hand-solder? | PCB layers | Notes |
|---|---|---|---|
| DIP / TQFP | Yes, with an iron | 2-layer fine | Best for first prototypes |
| QFN | Reflow or hot air | 2-4 layer | Smaller, cheaper assembly |
| BGA | No, needs reflow plus X-ray | 4-6+ layer | Adds blind and buried vias, which raises board cost |
Skip BGA for a one-off prototype. A approximately 0.5 mm BGA forces you onto a 6-layer board and machine assembly. The same chip die in a QFN package lets you build on a 2-layer board right at home.
Check Lifecycle Status and Second-Source Availability First
Before you commit, verify the part shows “Active” lifecycle status, not NRND (Not Recommended for New Designs) or EOL (End of Life). A chip can meet every spec and still wreck your roadmap if the vendor plans to discontinue it in 18 months.
Lifecycle and long-term availability are core business constraints when choosing a chip for products built over several years.
Pull the official product status page from the vendor, not a distributor listing. Texas Instruments, ST, and NXP publish lifetime guarantees, many industrial-grade MCUs carry 10- to 15-year availability commitments. Hobby and consumer parts often carry none.
How to read the warning signs that matter when you decide how to choose the right chip for embedded project work:
- Lead time over 26 weeks: a supply red flag. The 2021–2023 shortage pushed some MCU lead times past 52 weeks.
- Single distributor stocking it: if only one source carries inventory, you’ve no buffer.
- No pin-compatible alternative: a redesign costs weeks of layout and re-certification.
Pick families with a second source. STM32 and many RP2040-class parts have pin-compatible siblings, so a swap stays a footprint change, not a board respin. Check stock across Digi-Key, Mouser, and Arrow before you lock the BOM.
Calculate Total Cost of Ownership Beyond the Unit Price
The chip that costs approximately $1.80 can end up more expensive than the one at approximately $3.20. Total cost of ownership (TCO) bundles the unit price with toolchain fees, debugger hardware, RTOS royalties, and engineering hours burned on weak documentation. For a 5,000-unit product, software friction often dwarfs the silicon bill.
Here is where competitors stay silent. A commercial compiler seat from IAR or Arm Keil can run $3,000,$5,000 per developer per year. A flat approximately $40 J-Link debugger looks cheap until you need the approximately $1,500 J-Link PLUS for production flash programming.
RTOS choice swings the math too. FreeRTOS ships royalty-free, but some commercial stacks charge per-unit fees that add cents to every board. Multiply those cents by your production volume and a “cheaper” stack can lose.
| Ecosystem | IDE / Compiler | Debugger | Doc quality (dev-hour impact) |
|---|---|---|---|
| STM32 | STM32CubeIDE, free (GCC) | ST-LINK, ~approximately $25 | Deep but fragmented across HAL versions |
| ESP32 | ESP-IDF, free (open source) | Built-in USB-JTAG | Strong community, examples plentiful |
| Nordic nRF | nRF Connect SDK, free | J-Link OB on dev kit | Tight BLE docs, smaller forum base |
When you decide how to choose the right chip for an embedded project, score documentation and library maturity directly. CloudTweaks notes that ecosystem quality cuts development time. A poorly documented part can cost two engineering weeks, roughly $8,000 at approximately $100/hour, wiping out any per-unit savings.
A Reproducible Scoring Worksheet to Rank Your Shortlist
Stop picking chips by feel. Build a weighted decision matrix: list your prioritized requirements as rows, assign each a weight, score every candidate 1,5, then multiply and sum.
The chip with the highest weighted total wins. This is the standard structured selection method engineers use, and it turns a fuzzy debate into a number anyone on your team can audit.
Here is a worked example for a battery-powered IoT sensor, comparing three real candidate families. Weights reflect that this product lives or dies on power and lifecycle.
| Criterion | Weight | Chip A | Chip B | Chip C |
|---|---|---|---|---|
| Deep-sleep current | approximately 25% | 5 | 3 | 4 |
| Lifecycle & second-source | approximately 20% | 4 | 5 | 3 |
| Peripheral fit | approximately 20% | 3 | 4 | 5 |
| Total cost of ownership | approximately 20% | 4 | 3 | 4 |
| Toolchain & ecosystem | approximately 15% | 3 | 5 | 4 |
| Weighted total | approximately 100% | 3.90 | 3.95 | 4.05 |
Notice how close the totals are. When two scores sit within 0.2 points, the matrix is telling you both work, so break the tie on whichever criterion carries the highest weight.
Here that’s deep-sleep current, so Chip A’s perfect 5 deserves a second look despite its lower total.
Keep the worksheet in a shared spreadsheet. Re-running it’s the cleanest way to document how to choose the right chip for an embedded project when an auditor or a new hire asks “why this part?”
Worked Example — From Requirements to Three Specific Parts
Take a real spec: a battery-powered sensor node running off a CR2032 coin cell, Bluetooth Low Energy (BLE), under $3 BOM, with a 5-year field life. The winning part is the Nordic nRF52810. Here is why it beat two strong rivals.
The constraints translate into hard ceilings: average current must stay near 5 µA to hit 5 years on a approximately 230 mAh cell, and the radio must be BLE 5.x certified.
That immediately rules out any chip without integrated approximately 2.4 GHz transceiver, an external radio blows both the BOM and the board area.
| Part | Sleep current | Unit price (10k) | BLE stack | Weighted score |
|---|---|---|---|---|
| Nordic nRF52810 | 0.4 µA (System OFF) | approximately $1.95 | SoftDevice, mature | 87 |
| TI CC2640R2F | 1.0 µA (standby) | approximately $2.40 | BLE-Stack, solid | 78 |
| Silicon Labs EFR32BG22 | 1.4 µA (EM2) | approximately $2.20 | Bluetooth SDK | 81 |
Apply the weighted decision matrix from the scoring worksheet. Power weighted approximately 30%, cost approximately 25%, ecosystem approximately 25%, lifecycle approximately 20%.
The CC2640R2F lost on price and a thinner toolchain. The BG22 scored highest on radio sensitivity, but Nordic’s deep-sleep current, a true differentiator when learning how to choose the right chip for embedded project work, clinched the energy budget.
The deciding cut: at 0.4 µA sleep, the nRF52810 leaves roughly 40% more current headroom for sensor sampling than the BG22. That margin protects the 5-year target even if duty cycle rises later.
Common Mistakes That Force Costly Redesigns
The four mistakes that trigger board respins are predictable: picking the cheapest chip and hitting flash limits, ignoring NRND warnings, underestimating RAM for a TLS handshake, and choosing exotic parts with no community behind them. Each one leaves an early warning sign. Most teams just don’t look for it.
The cheapest-chip trap. A approximately $1.20 MCU with approximately 64KB flash looks fine until firmware grows. A typical Bluetooth Low Energy stack alone eats approximately 80,120KB.
The signal you missed: your first “hello world” build already used approximately 40% of flash. Rule of thumb, if your initial image exceeds approximately 50% of available flash, you’ve no room for features or bug fixes.
KDAB’s guidance recommends overspecifying memory to absorb future growth.
Underestimating RAM for security. A single TLS 1.2 connection with mbedTLS needs approximately 32,48KB of RAM just for buffers and session state. Teams spec a approximately 32KB-RAM part, then discover the handshake won’t complete.
The early signal: your connectivity requirement included HTTPS or MQTT-over-TLS, but you never checked the stack’s RAM footprint in the vendor’s release notes.
Ignoring NRND flags. Choosing a part already marked Not Recommended For New Designs means a forced migration within 2,3 years. The warning was on the product page the whole time.
Picking exotic silicon. A chip with no forum threads, no Stack Overflow answers, and one obscure SDK turns a 2-day driver task into 2 weeks. Knowing how to choose the right chip for embedded project work means weighting ecosystem support as heavily as raw specs.
Frequently Asked Questions
How do you pick a microcontroller for a project? Start with your four product constraints, list every peripheral you need, then score two or three candidate parts against weighted criteria. The chip with the highest weighted sum wins.
This structured method beats gut feeling and prevents the board respins that eat weeks of schedule.
Which microcontroller is best for embedded work?
There’s no single best chip. The right answer depends on your power budget, connectivity needs, and production volume.
A coin-cell sensor node and a smart camera have nothing in common. That said, the Arm Cortex-M family dominates 32-bit embedded design, so most projects start there.
Match the processor to your software needs too, check for RTOS or Linux support and vendor middleware before committing.
Is STM32 or ESP32 a safer default?
Pick STM32 when you need precise low-power control, deterministic timing, or tight current budgets. Pick ESP32 when built-in Wi-Fi and Bluetooth save you a separate radio chip and weeks of RF design.
For a hobby project that talks to the cloud, ESP32 ships faster. For a battery product needing sub-microamp sleep, STM32 wins.
How can beginners start building profitably?
Buy a approximately $15,$40 evaluation board for your chosen chip family, not a custom PCB. Hardware guidance recommends dev boards to de-risk the design first. Learning how to choose the right chip for embedded project work this way costs almost nothing and saves expensive mistakes.
Your Next Steps to a Confident Chip Decision
Run this five-step workflow in order, top to bottom.
Skipping a step is how teams end up with the wrong part: write down your four product constraints, set numeric targets for compute and memory, build a peripheral inventory, score your shortlist with weights, then validate on a dev board before you route a single trace.
Here is the checklist to work through today:
- Lock your four numbers. Power budget, BOM cost ceiling, board size, and production volume. These filter out approximately 80% of parts before you read any datasheet.
- Fill the scoring worksheet. Use the weighted decision matrix from earlier — assign each factor a 1–5 weight, score each candidate, and pick the highest weighted sum. Practitioner guidance backs this method as the standard way to rank candidates objectively.
- Add 20–approximately 30% headroom. Slightly overspec flash and clock speed so a future firmware feature doesn’t force a respin.
- Confirm lifecycle and a second source for every part still in the running.
- Buy two dev boards for your top two candidates.
That last step matters most. Knowing how to choose the right chip for embedded project work means proving it in hardware first.
Hardware-selection guidance from KDAB recommends starting on a commercial evaluation board for your chosen MCU family to de-risk the design before any custom PCB. A approximately $25 dev board catches a missing peripheral or a flaky low-power mode in a week.
A botched custom board costs weeks and a respin. Validate, then route.
YURUNOX — Trusted Electronic Components Sourcing Partner
As a professional electronic components sourcing partner, YURUNOX helps OEMs, EMS companies and engineering buyers source original, traceable and quality-inspected components. Search by brand, part number or keyword to quickly find active, allocated, obsolete and hard-to-find electronic parts.
- ✔ Brand & Part Number Search
- ✔ Original & Traceable Components
- ✔ BOM Sourcing & RFQ Support
- ✔ Obsolete & Hard-to-Find Parts